- From scratch
- From document templates
Creating a workflow from scratch
The easiest way to start is from the home. On the home screen, you’ll find a text box similar to a chat interface. Here, you can:- Describe the type of document you want to parse
- Explain what you want to extract
- Upload documents
- Dragging and dropping
- Clicking Add document

The workflow lifecycle
Every workflow goes through three steps:
You always move in this order.
Step 1: Define
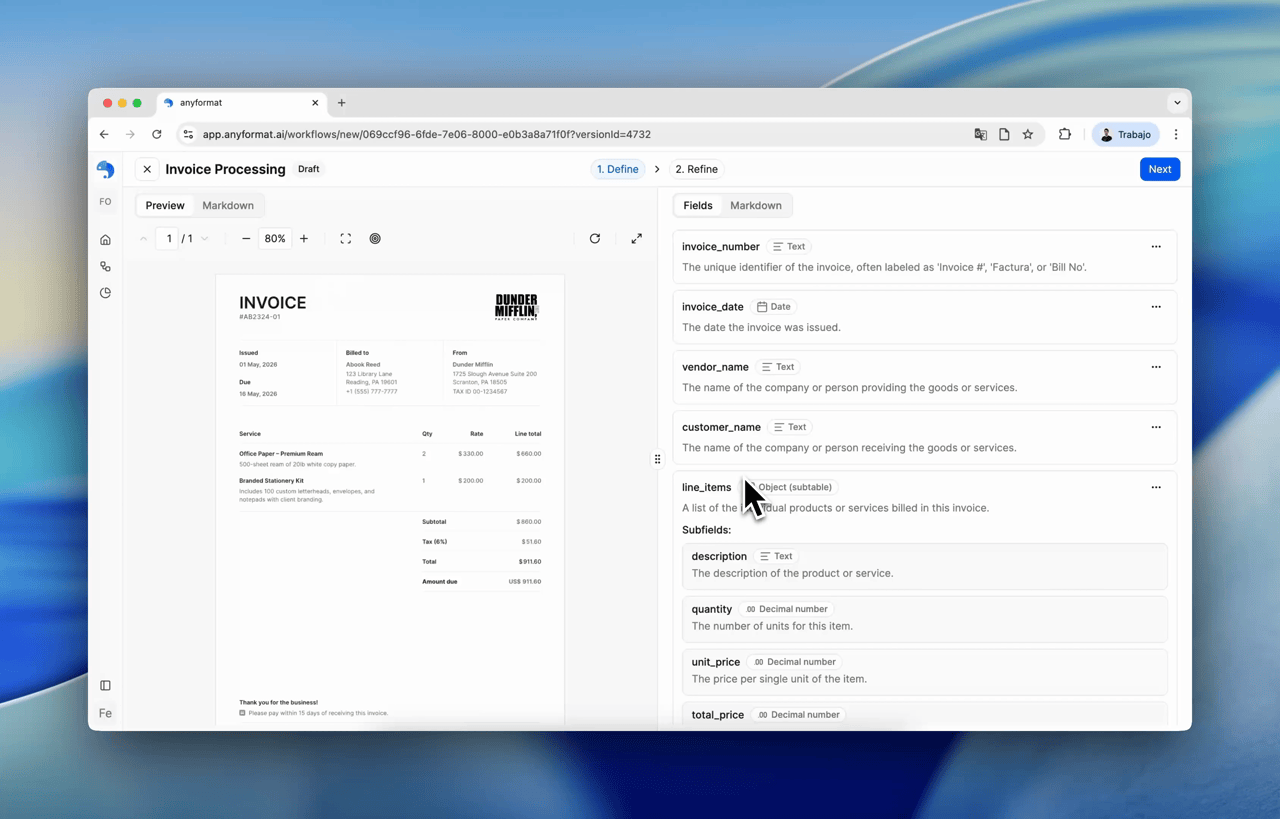
This is where you define what data you want.The workspace layout
During definition, the screen is split into two areas:Document viewer (left)
- Displays the uploaded document
- Shows one document at a time
- Supports multi-page documents
Fields panel (right)
- Add fields manually
- Ask AI to suggest fields
- Edit existing fields
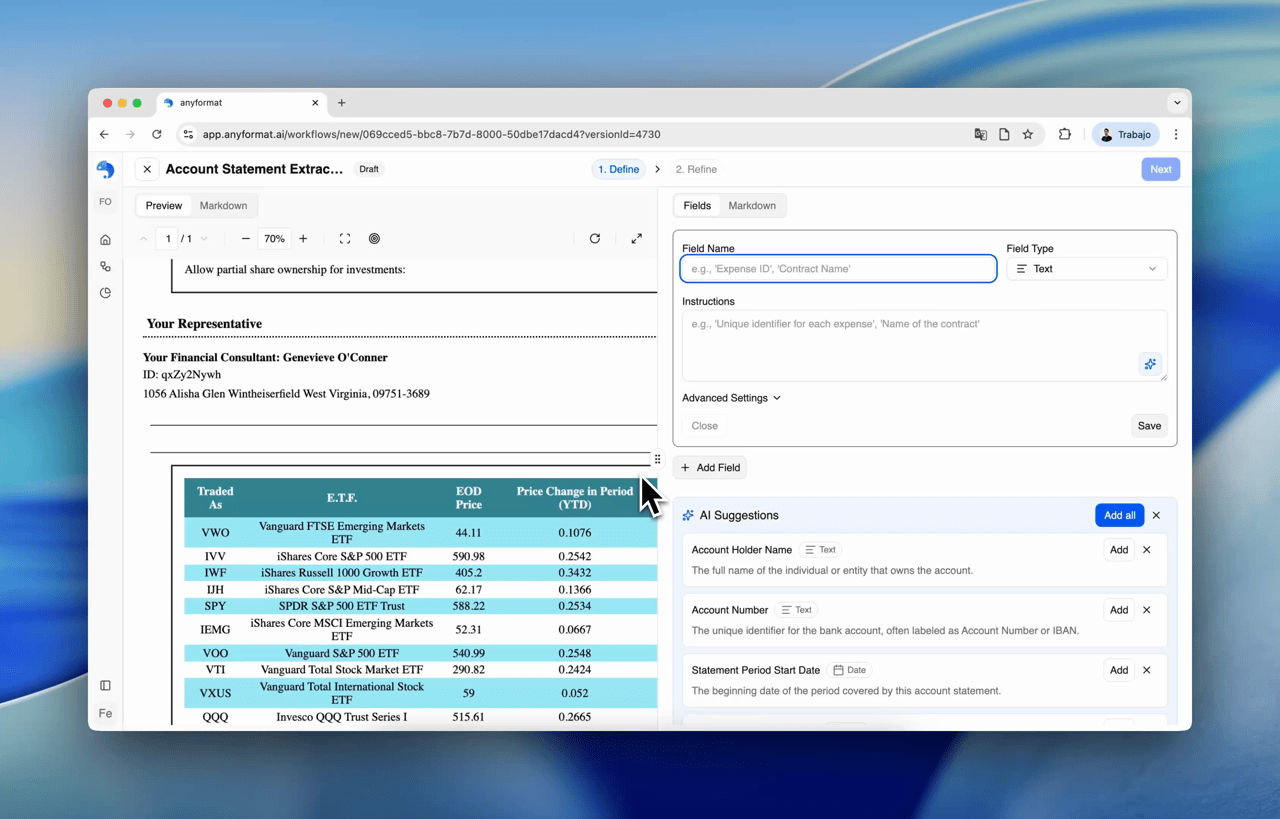
AI suggestions
Suggestions are generated based on:- The prompt
- The document
- Or both
- Add suggested fields
- Edit them later
- Ignore them completely
Adding fields manually
To add a field:- Click New field
- Choose:
- Field name
- Field type (see Field types)
- Instructions (or let AI generate them from the name)
- Duplicate fields
- Delete fields (from the three-dot menu on the field card)

Special field types
For some field types:- Select / Multiselect - define option names and descriptions
- Object (Subtable) - define subfields
- Click the field
- View its properties in the card preview
- See options or subfields directly
Before moving on
Before continuing:- Make sure all fields are saved
- You can edit fields later, but saving now avoids issues
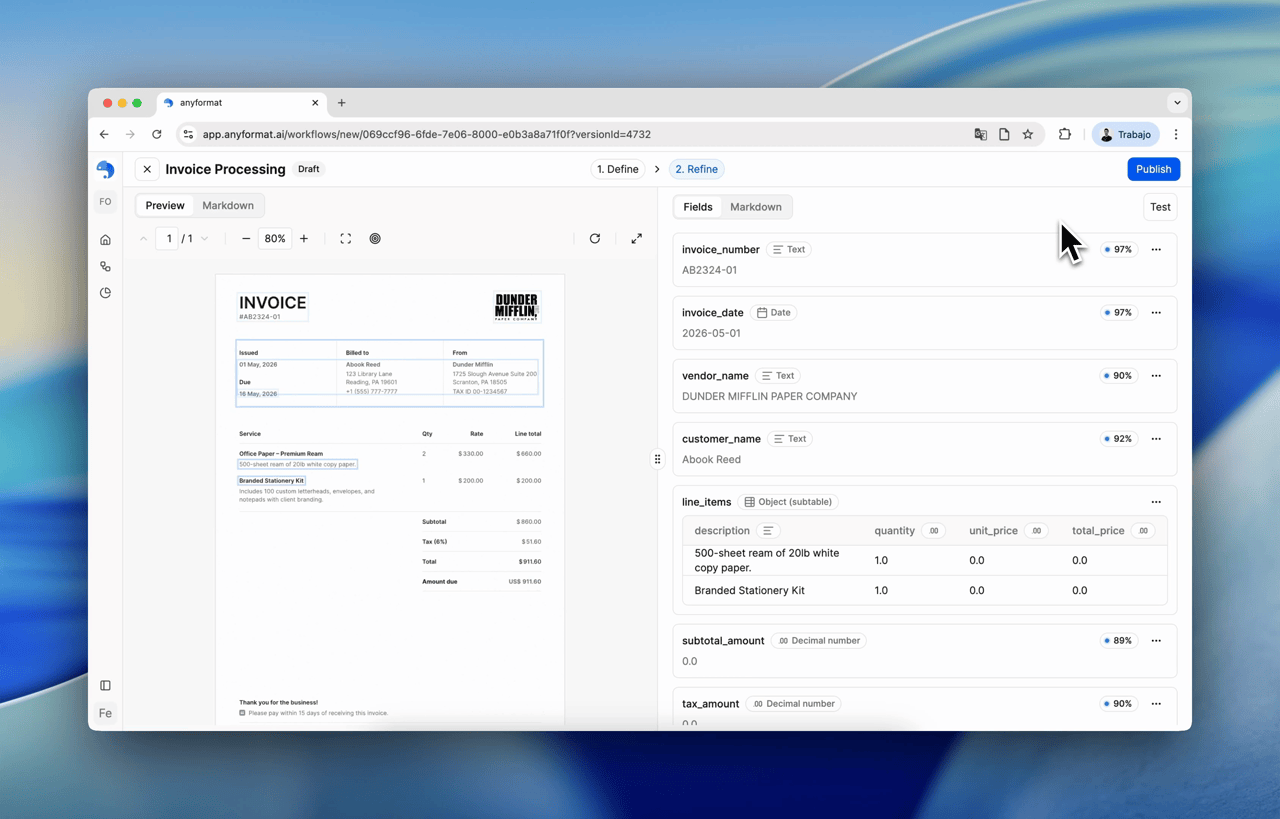
Step 2: Refine
This step is about checking and improving quality.Running the workflow
- Processing runs automatically
- It may take a few moments to complete
Reviewing results
You can review results using:- The document view
- The Markdown representation
Visual grounding
Each extracted field is linked to its location in the document:- Highlighted in a single color in the document viewer
- Clicking a field highlights it in the document — and clicking an area in the document highlights the corresponding field
Step 3: Publish
Once you’ve reviewed the results and they look correct:- You can publish the workflow
- Upload additional documents
- Apply the workflow at scale
- Start generating data
After publishing
Published workflows:- Appear in the home
- Appear in the Workflows section
- Can be reused and run multiple times
What’s next?
Running Workflows
Learn how to run workflows on documents
Validation & Review
Review and validate extracted data at scale