> ## Documentation Index
> Fetch the complete documentation index at: https://docs.anyformat.ai/llms.txt
> Use this file to discover all available pages before exploring further.
# The building blocks
> What each Studio step does, what you configure, and when to add it.
A workflow is made of five steps. Most workflows only use the first two — **Parse** and **Extract**. The other three are there for when your documents are more complicated.
***
## Parse
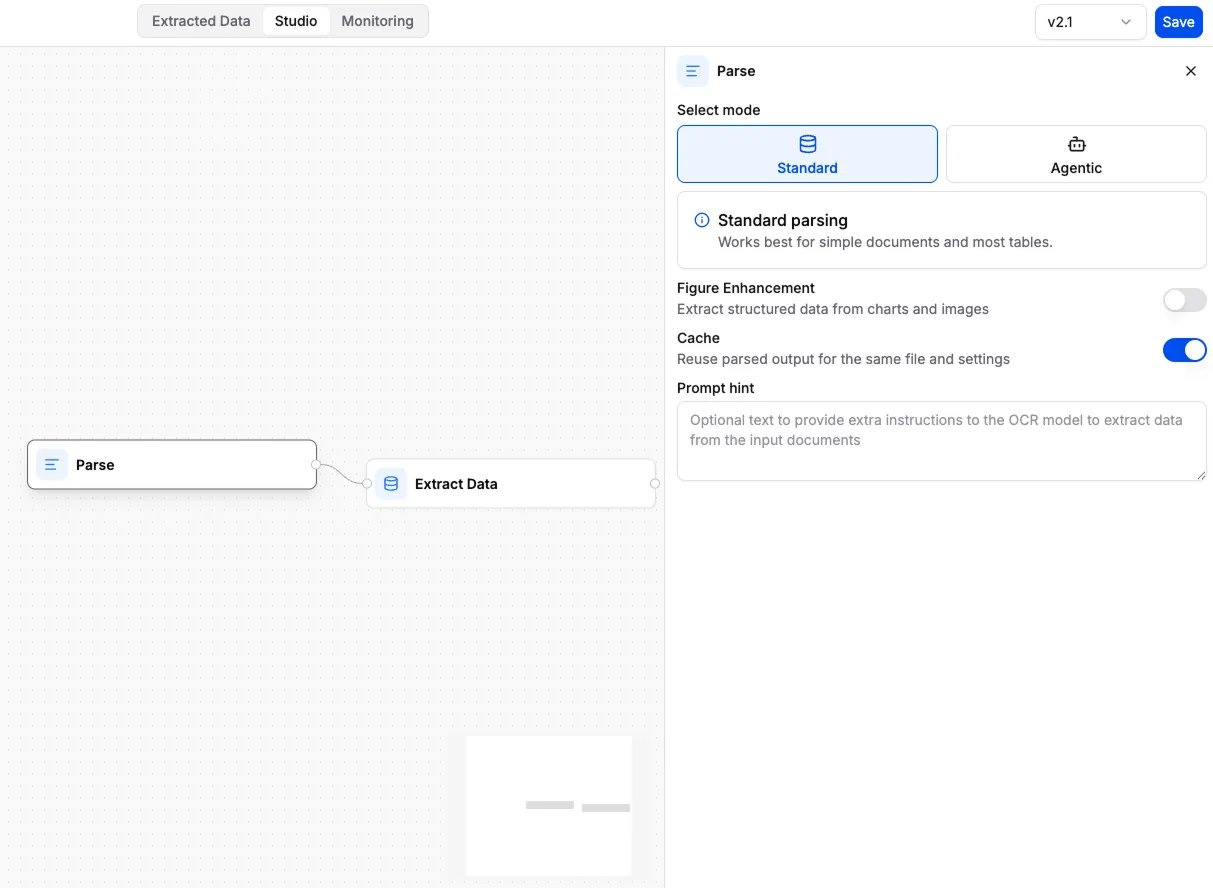
 **Reads the document.** Parse turns your file (PDFs, images, CSVs, and more) into clean text and tables that the rest of the workflow can work with. Every workflow starts with a Parse step.
* **You configure:** usually nothing — Parse works out of the box. Advanced options let you give a hint about the document or tune how figures are handled.
* **Add it when:** always. It's the first step in every workflow.
> *Example:* upload a bank statement PDF — Parse reads and prepares all the text and layout.
**Reads the document.** Parse turns your file (PDFs, images, CSVs, and more) into clean text and tables that the rest of the workflow can work with. Every workflow starts with a Parse step.
* **You configure:** usually nothing — Parse works out of the box. Advanced options let you give a hint about the document or tune how figures are handled.
* **Add it when:** always. It's the first step in every workflow.
> *Example:* upload a bank statement PDF — Parse reads and prepares all the text and layout.
 ***
## Extract
***
## Extract
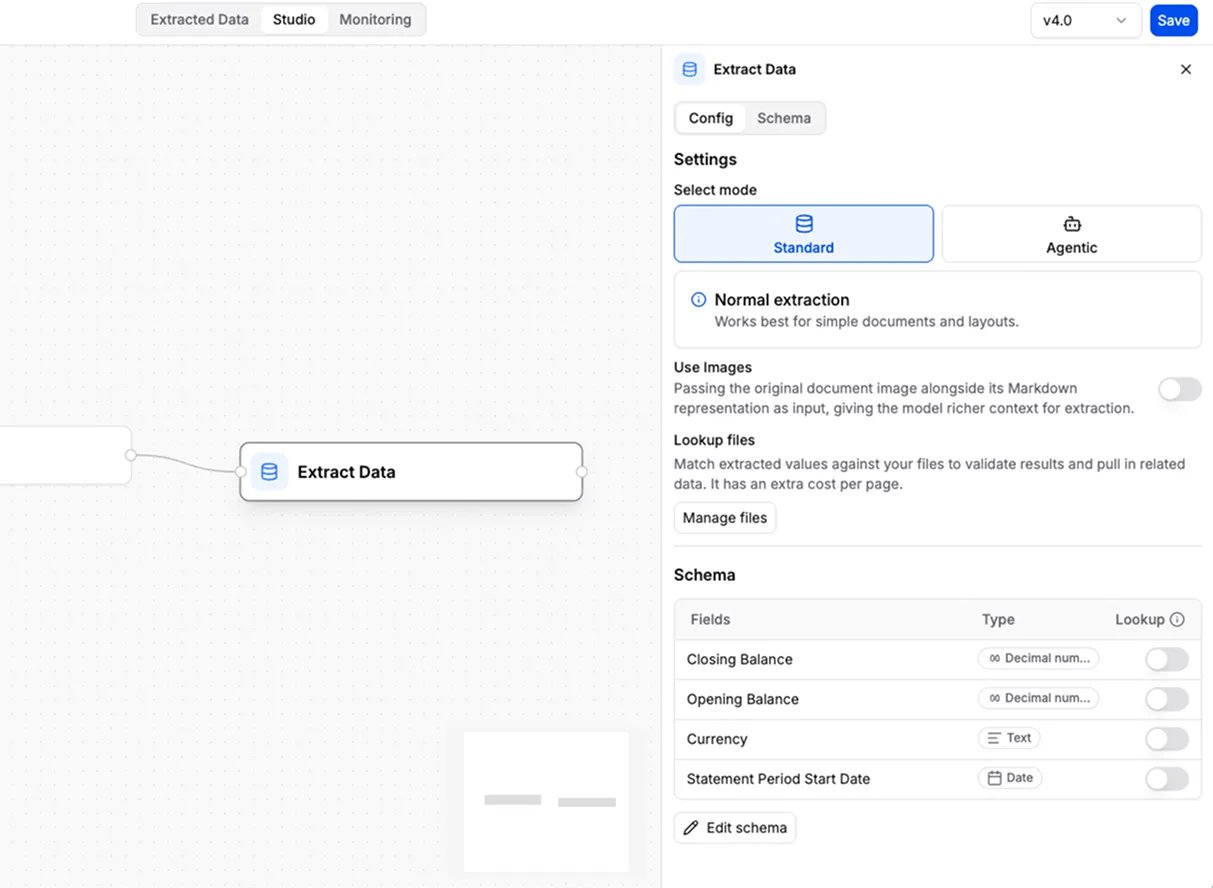
 **Pulls out the fields you ask for.** Extract takes the text from Parse and returns structured data according to the [fields](/concepts/fields) you define.
* **You configure:** the list of fields — each with a name, a [type](/concepts/field-types), and an instruction. This is your [schema](/concepts/schemas). A field can also be resolved from an uploaded reference file instead of the document — see [Smart Lookup](/concepts/smart-lookup).
* **Add it when:** you want specific values back (the usual case). Skip it only for a parse-only workflow.
> *Example:* define fields like "Account number", "Transaction date", and "Amount" to get them from every statement.
**Pulls out the fields you ask for.** Extract takes the text from Parse and returns structured data according to the [fields](/concepts/fields) you define.
* **You configure:** the list of fields — each with a name, a [type](/concepts/field-types), and an instruction. This is your [schema](/concepts/schemas). A field can also be resolved from an uploaded reference file instead of the document — see [Smart Lookup](/concepts/smart-lookup).
* **Add it when:** you want specific values back (the usual case). Skip it only for a parse-only workflow.
> *Example:* define fields like "Account number", "Transaction date", and "Amount" to get them from every statement.
 ***
## Classify
***
## Classify
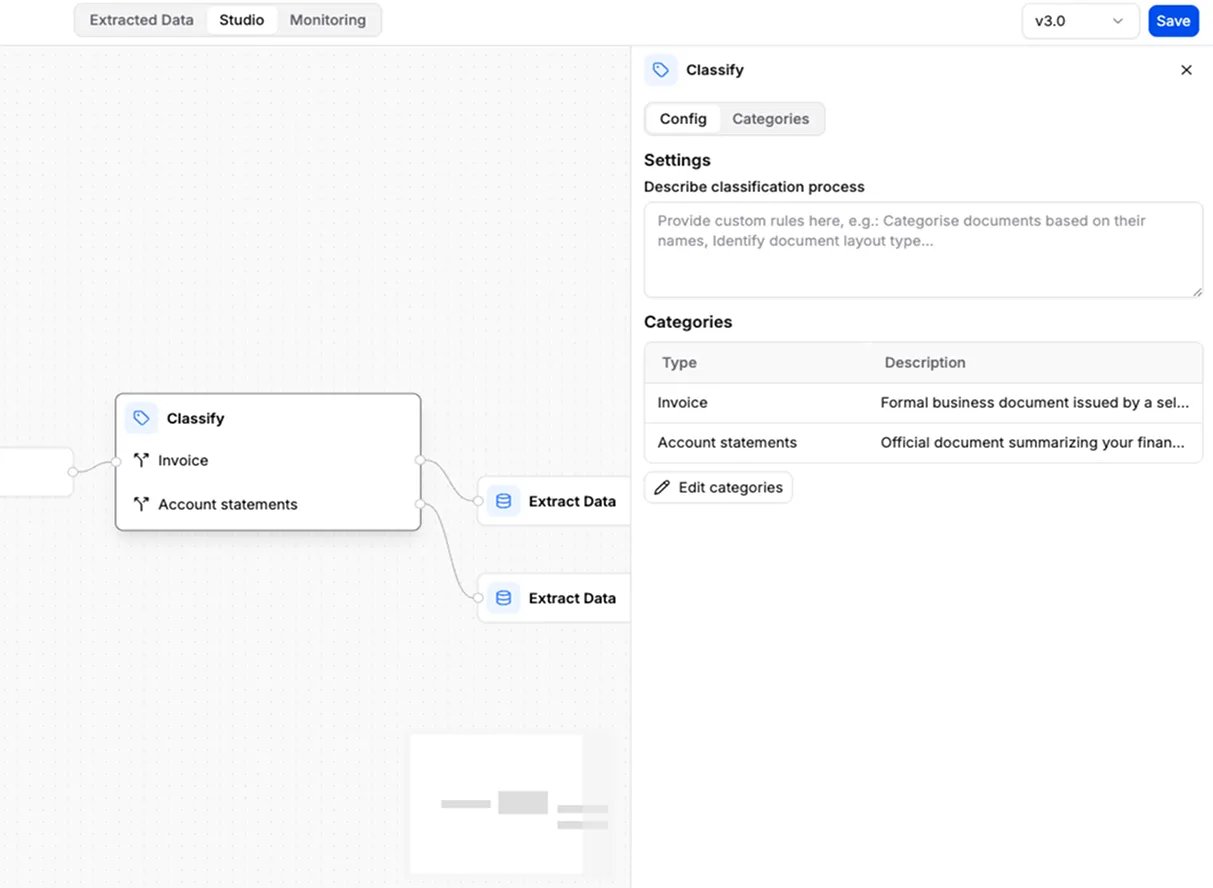
 **Sorts documents into types you define.** Classify looks at each document and labels it as one of the categories you set up, so you can handle each type differently downstream.
* **You configure:** a list of categories, each with a name and a short description of what belongs in it.
* **Add it when:** one workflow needs to handle several kinds of document — for example a mailbox that receives both invoices and contracts. After Classify, connect a separate Extract step for each category.
> *Example:* automatically label incoming files as "Invoice", "Contract", or "Statement".
**Sorts documents into types you define.** Classify looks at each document and labels it as one of the categories you set up, so you can handle each type differently downstream.
* **You configure:** a list of categories, each with a name and a short description of what belongs in it.
* **Add it when:** one workflow needs to handle several kinds of document — for example a mailbox that receives both invoices and contracts. After Classify, connect a separate Extract step for each category.
> *Example:* automatically label incoming files as "Invoice", "Contract", or "Statement".
 ***
## Split
***
## Split
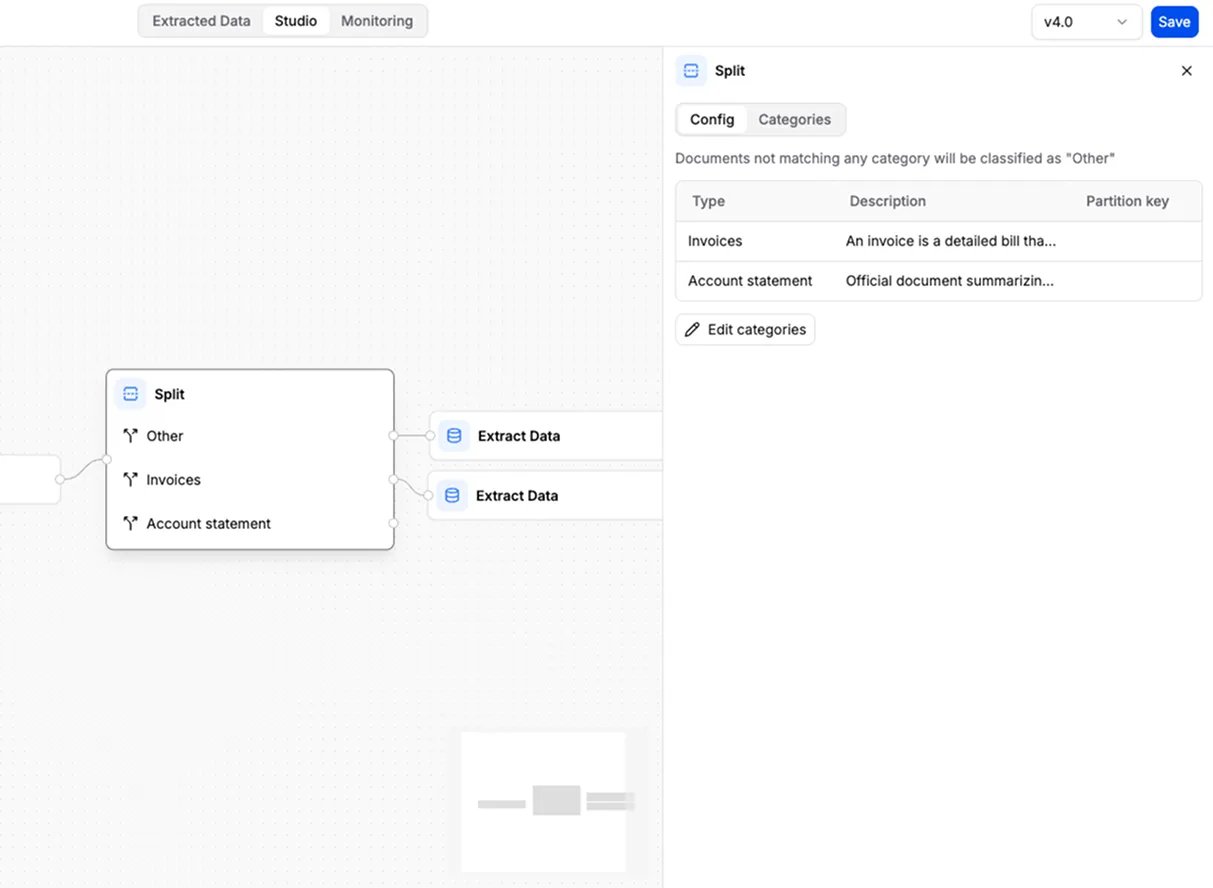
 **Breaks one file into several documents.** Split takes a single file that actually contains multiple documents and separates it into pieces, so each piece is processed on its own.
* **You configure:** the split rules, each with a name and a description. Anything that doesn't match a rule is grouped as "other".
* **Add it when:** your uploads bundle several documents together — for example a single PDF with four invoices, or a 50-page report you want handled page by page.
> *Example:* a 50-page report gets split so each section is processed separately.
**Breaks one file into several documents.** Split takes a single file that actually contains multiple documents and separates it into pieces, so each piece is processed on its own.
* **You configure:** the split rules, each with a name and a description. Anything that doesn't match a rule is grouped as "other".
* **Add it when:** your uploads bundle several documents together — for example a single PDF with four invoices, or a 50-page report you want handled page by page.
> *Example:* a 50-page report gets split so each section is processed separately.
 ***
## Validate (Beta)
***
## Validate (Beta)
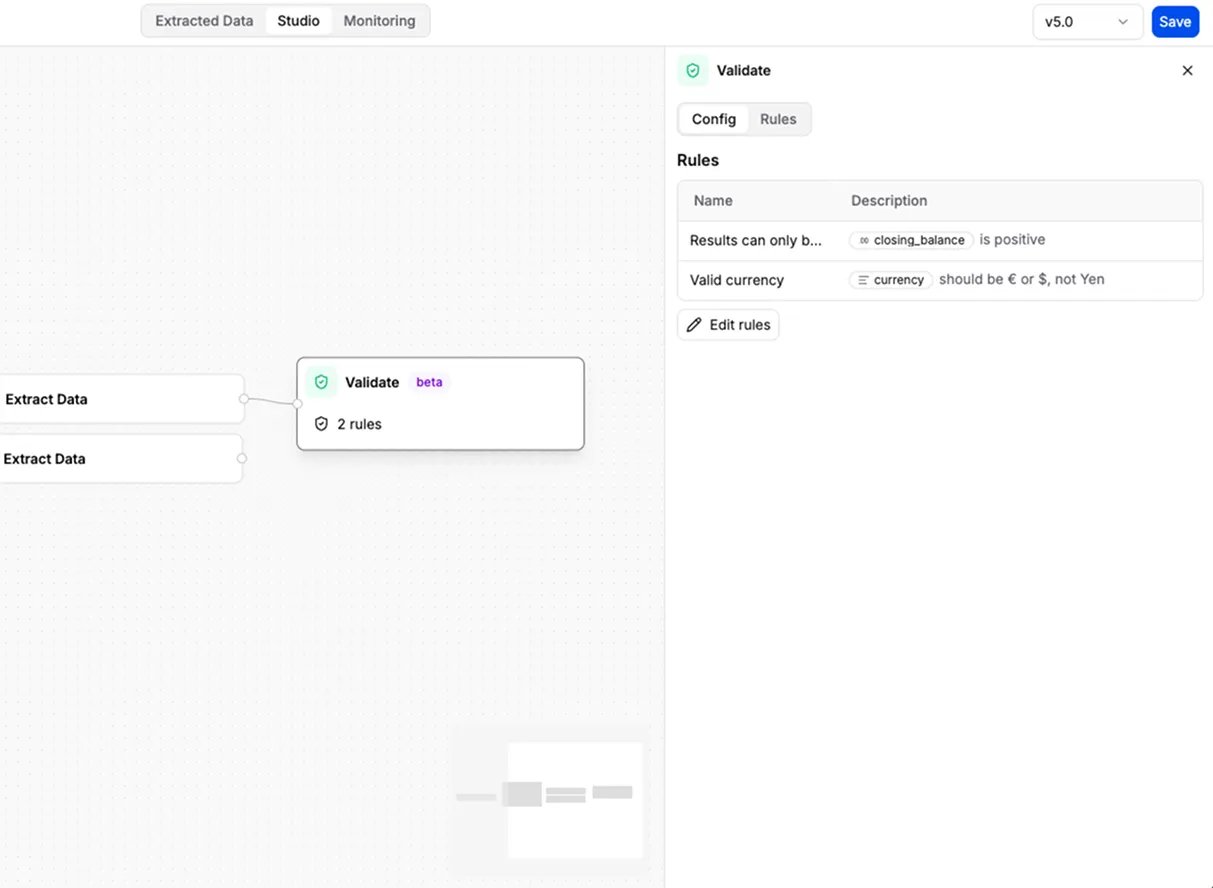
 **Checks the results against rules you write.** Validate takes the data from an Extract step and tests it against rules you describe in plain language, then flags anything that fails — so problems surface automatically instead of slipping through.
**Validate vs. verify — two different things.** The **Validate** step is an automatic check built into the workflow: anyformat runs your rules on every document. **Verifying** is something *you* do by hand afterward — marking a value as correct with the thumbs-up (see [Verification & review](/guides/workflows/verification-review)). One is the machine checking your rules; the other is you confirming the result.
* **You configure:** a list of rules. Each rule is one of two kinds — an **AI** rule you describe in plain language (for example, "the IBAN is a valid format" or "the document is not expired"), or a **deterministic** rule you build from a structured check (a number/date in range, `a + b = c`, a value in a set, a pattern match, a required field) that runs instantly with no AI. You can mix both in the same step.
* **Add it when:** some results must meet conditions, and you want failures flagged automatically. Place Validate after the Extract step whose output you want to check.
* **Where results show up:** failures appear in the **Validation** tab of the results, alongside the extracted data.
> *Example:* check that the name on an ID matches the name on the contract (AI), confirm the invoice year is between 1995 and 2050, or that subtotal + tax equals the total (deterministic).
See **[Validation rules](/guides/studio/validate-rules)** for the full list of deterministic checks and when to choose AI vs deterministic.
**Checks the results against rules you write.** Validate takes the data from an Extract step and tests it against rules you describe in plain language, then flags anything that fails — so problems surface automatically instead of slipping through.
**Validate vs. verify — two different things.** The **Validate** step is an automatic check built into the workflow: anyformat runs your rules on every document. **Verifying** is something *you* do by hand afterward — marking a value as correct with the thumbs-up (see [Verification & review](/guides/workflows/verification-review)). One is the machine checking your rules; the other is you confirming the result.
* **You configure:** a list of rules. Each rule is one of two kinds — an **AI** rule you describe in plain language (for example, "the IBAN is a valid format" or "the document is not expired"), or a **deterministic** rule you build from a structured check (a number/date in range, `a + b = c`, a value in a set, a pattern match, a required field) that runs instantly with no AI. You can mix both in the same step.
* **Add it when:** some results must meet conditions, and you want failures flagged automatically. Place Validate after the Extract step whose output you want to check.
* **Where results show up:** failures appear in the **Validation** tab of the results, alongside the extracted data.
> *Example:* check that the name on an ID matches the name on the contract (AI), confirm the invoice year is between 1995 and 2050, or that subtotal + tax equals the total (deterministic).
See **[Validation rules](/guides/studio/validate-rules)** for the full list of deterministic checks and when to choose AI vs deterministic.
 ***
## What's next?
Open Studio, add steps, and connect them
The kinds of values an Extract step can return
***
## What's next?
Open Studio, add steps, and connect them
The kinds of values an Extract step can return